本文记录了使用 Github 的 Webhooks 进行网站自动化部署的实践步骤。
概述
我们将项目代码托管到 Github 上,为方便服务端更新网站代码,启用 Webhooks 来实现更新服务。
整个过程分为 4 步:
- 自动化 Shell 脚本更新代码;
- Node Server 监听 webhook push 事件;
- pm2 守护 Server 进程
- 配置 Github webhooks.
配置所需:
- shell 脚本
- Node Server
- github-webhook-handler
- pm2
自动化 Shell 脚本
该脚本的目的是在目标服务器上 pull 远程代码以实现迭代更新。
当我们在本地开发测试后,将代码 push 到 Github 上,会触发已配置好的 Webhooks,在目标服务器上执行这段 Shell 脚本。
我们在项目 root 目录下创建 deploy.sh 文件,添加以下内容。
#! /bin/bash
# 确保脚本抛出遇到的错误
set -e

cd /www/learning-handbook

git reset --hard origin/master
git clean -f
git pull
实现了 Shell 脚本后,我们需要提供一个 Server 给 Webhooks 调用它。
Node Server 实现更新服务
接下来,我们通过 Nodejs 创建一个 Server 来实现更新服务。
这里我们需要借助 github-webhook-handler 来监听 Github webhooks 的 push 请求,请求成功后通过 child_process 执行上面的 Shell 脚本,就能在服务器上获取更新了。
server
同样,在项目 root 下创建 webhook.js 代码如下:
const http = require('http')
const { spawn } = require('child_process')
const createHandler = require('github-webhook-handler')

// 下面这个 secret 是你在 github webhook 里设置的 secret 值
const handler = createHandler({ path: '/deploy', secret: 'xxx' })

const PORT = 6666

http.createServer((req, res) => {
  handler(req, res, err => {
    res.statusCode = 404
    res.end('no such location')
  })
}).listen(PORT)

handler.on('error', err => {
  console.error('Error:', err.message)
})

// 监听到push事件的时候执行我们的自动化脚本
handler.on('push', event => {
  console.log('Received a push event for %s to %s',
    event.payload.repository.name,
    event.payload.ref)
  runCommand('sh', ['./deploy.sh'], console.log)
})

function runCommand( cmd, args, callback ){
    let response = ''
    const child = spawn( cmd, args )
    child.stdout.on('data', buffer => { response += buffer.toString() })
    child.stdout.on('end', () => callback(response))
}
nginx 反向代理
配置 nginx 反向代理 /deploy
···
server {
    listen 80;
    server_name handbook.p2yang.com;
    ···
    location /deploy {
        proxy_pass http://127.0.0.1:6666;
    }
    ···
}
配置 Webhook
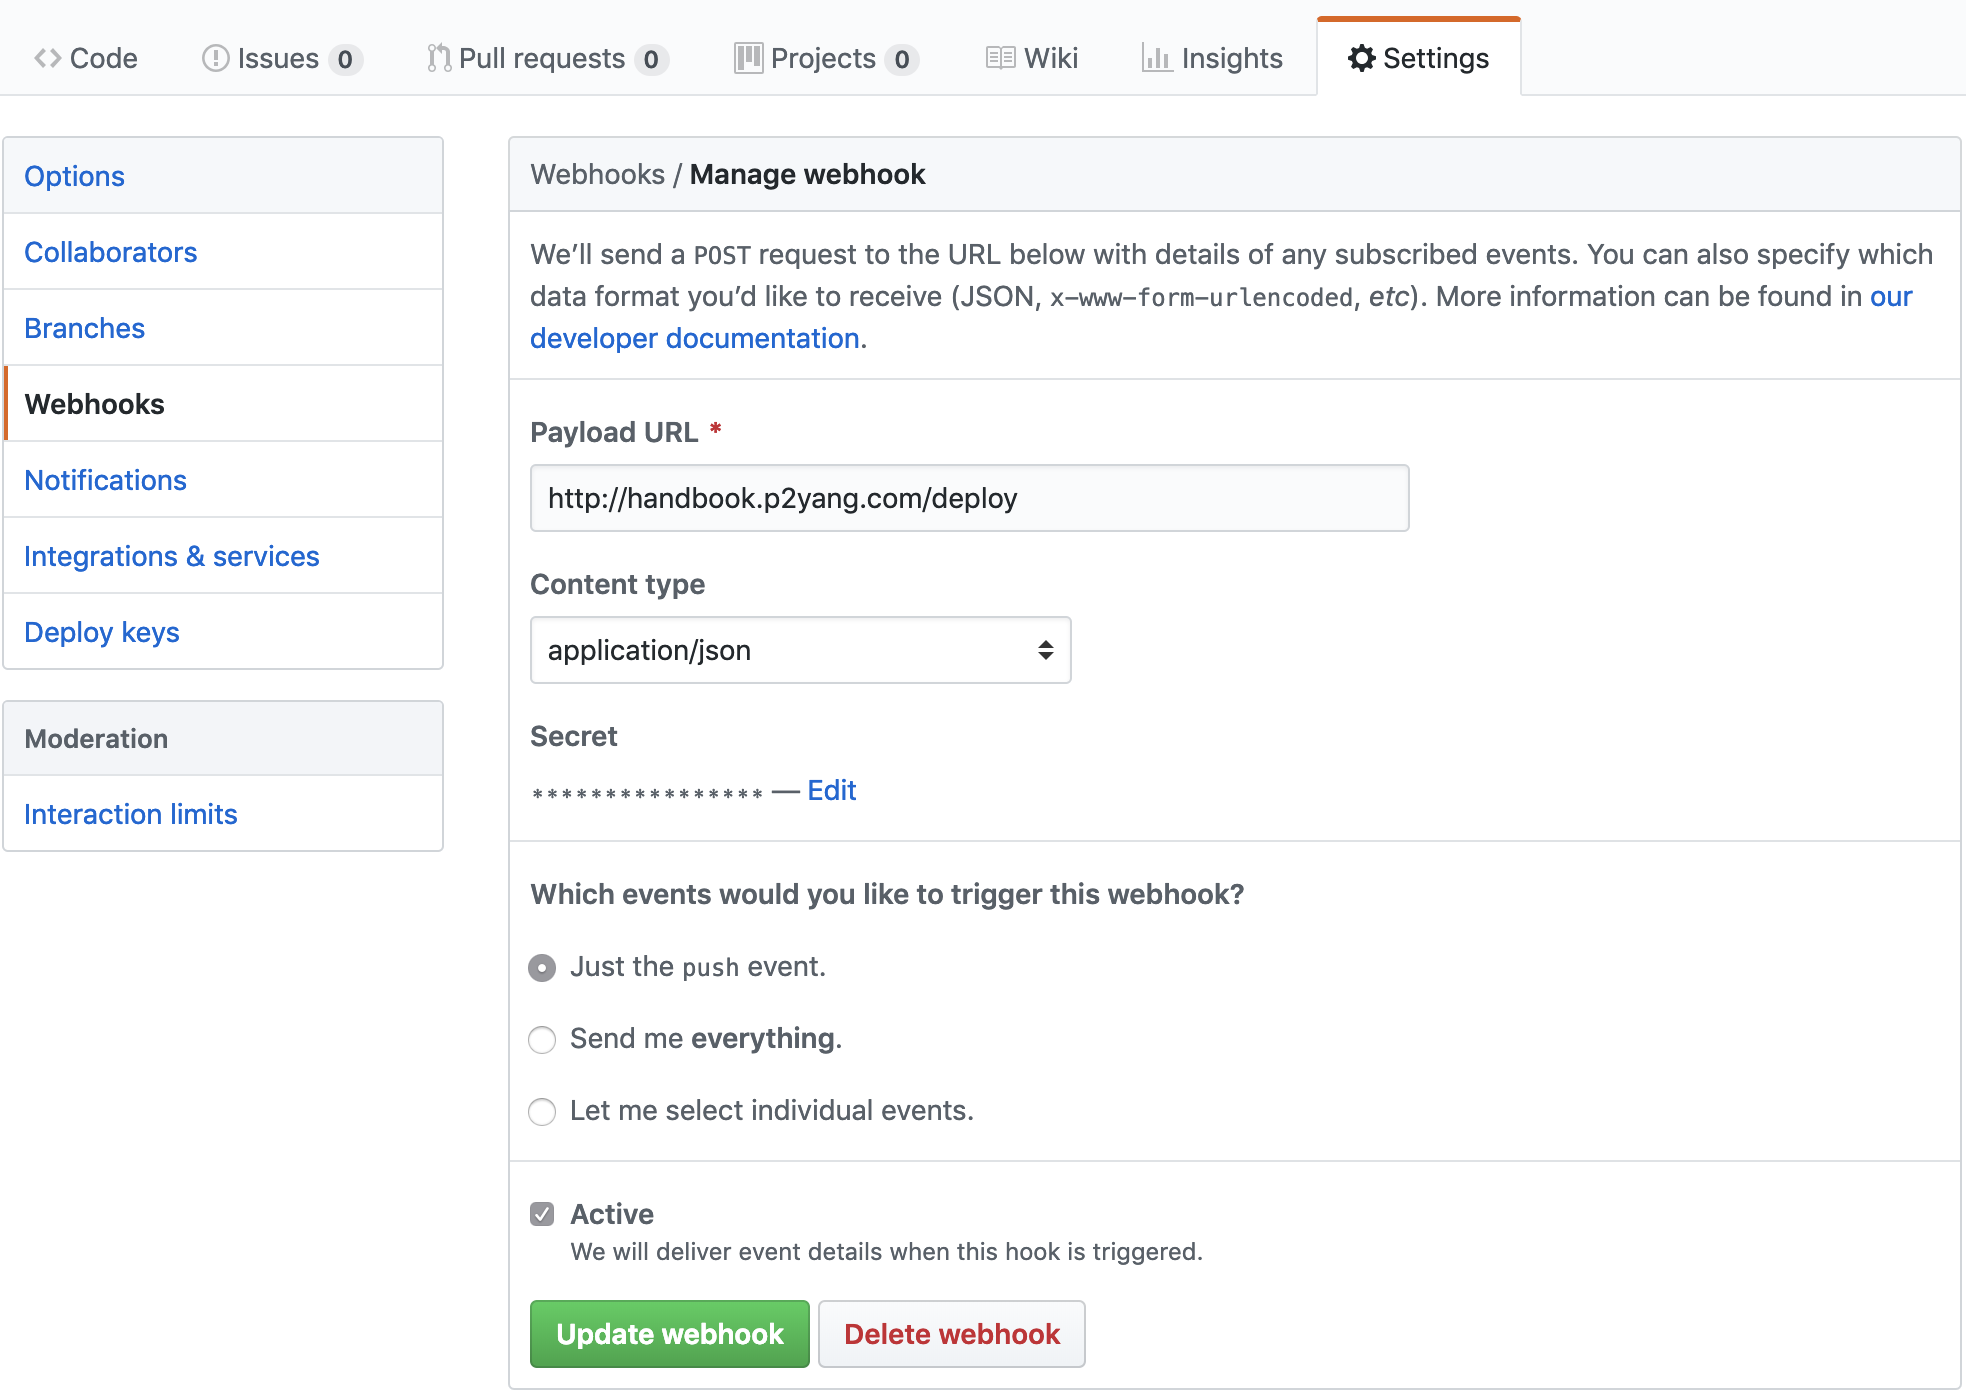
Webhooks 在 Github 项目的 Settings 里。进入其中添加一个新的 webhook,如下图:

注意,由于我们上面使用的 github-webhook-handler 要求 Content type 必须设置成 application/json。
Payload URL 和 Secret 值与 Server 配置需要保持一致。
const handler = createHandler({ path: '/deploy', secret: 'xxx' })
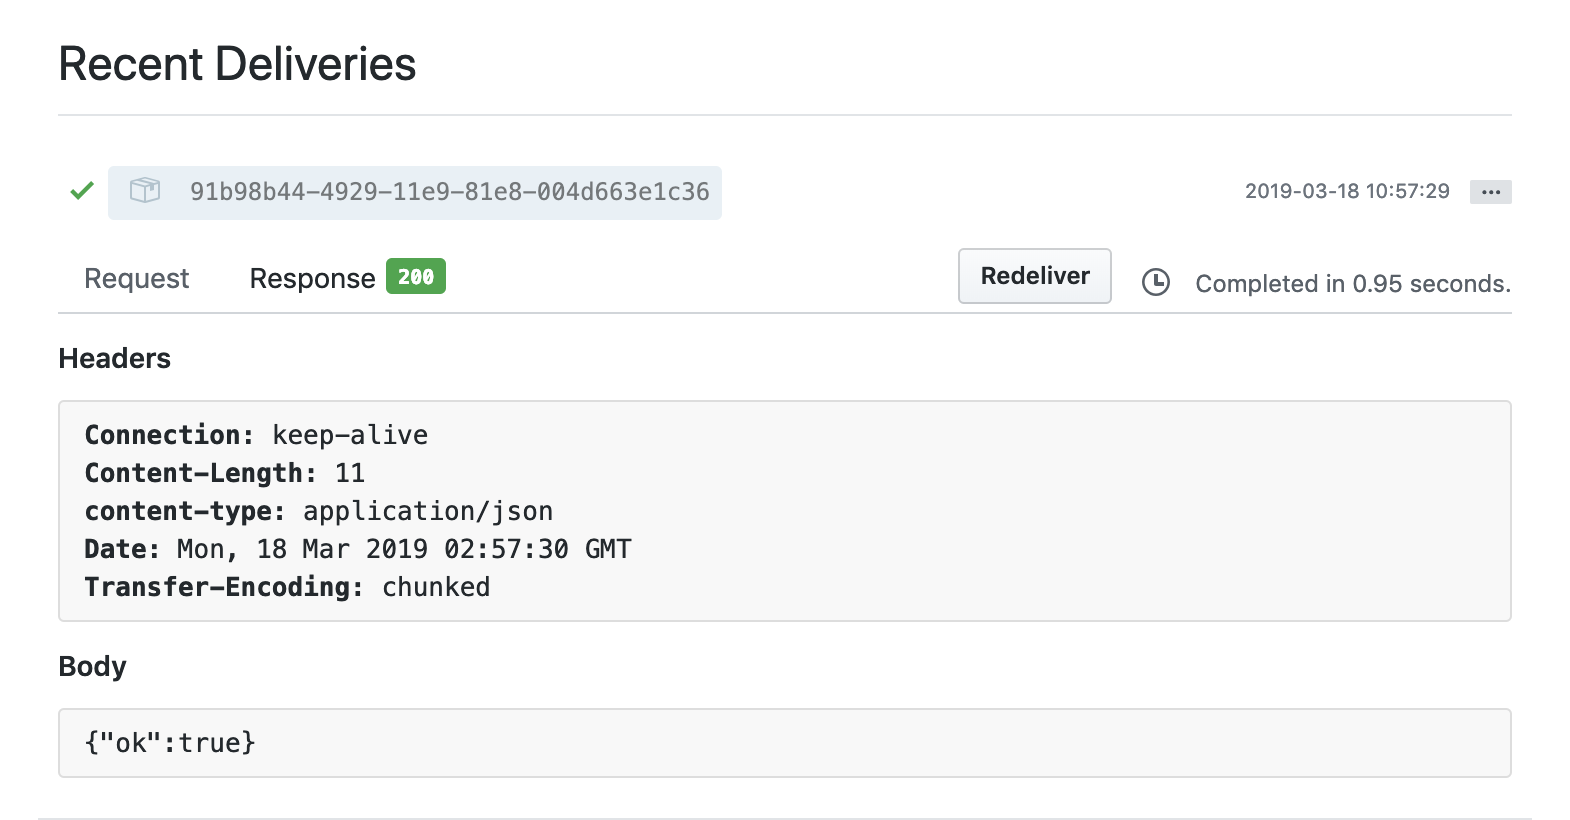
当服务全部配置成功后,webhook 的状态如下:

初次部署
第一次部署,需要先在目标服务器上 git clone 下项目代码。
pm2 守护
这里使用 pm2 来守护 Server 更新服务。基本用法如下:
首先全局安装 pm2:
npm install pm2 -g
启动服务:
pm2 start webhook.js
查看服务列表
pm2 list
查看日志
pm2 log [服务名或服务id]
其他
pm2 stop
pm2 restart
pm2 delete
大功告成!
小结
能自动的就自动吧,我们的时间可以花在更有趣的事情上!